

Audio warp is a great feature in Cubase because it can quantize audio. I’ve been using it for a while and I like to use it on all of my guitar tracks. Lets discover audio warping and talk about whats good about it.
Guitar Tracks
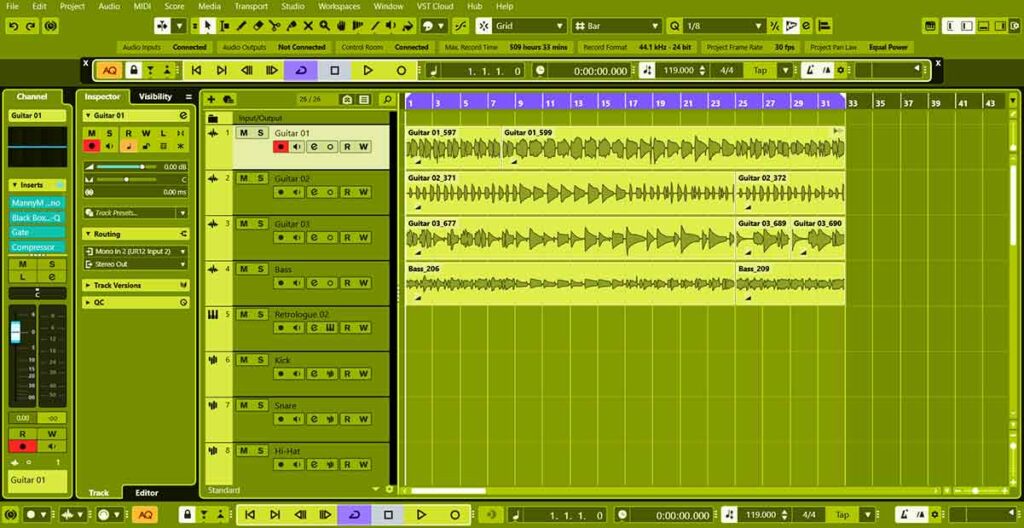
We recorded some guitar tracks and a bass track, now lets start working on them with digital processing. Lets mix as we go, so lets set the volume level in the effects channel menu. Lets solo guitar 1 and click on the E effects channel settings button. We want the level to be at about -18 so lets drop the pre gain to lower the volume.
Now the track is at a good level so we can add plugins to make it sound even better. First an equaliser, then a saturator, then a gate and then a compressor. The gate is great on guitars because it cleans up the tracks nicely.
Warp Markers
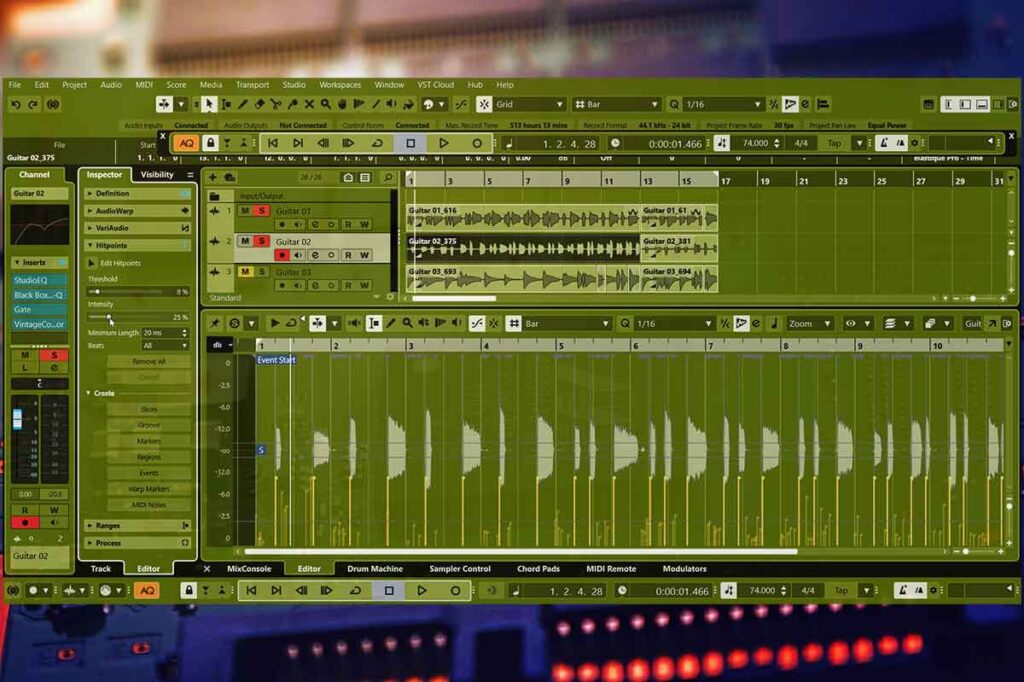
Lets double click on the guitar track and the lower zone of cubase will appear. Now we can click the inspector tab and go to hitpoints. We can adjust our threshold and intensity to set markers on all of the transients. Now lets click warp markers, then click on the audio warp menu and click free warp.
Quantize | Audio Warp

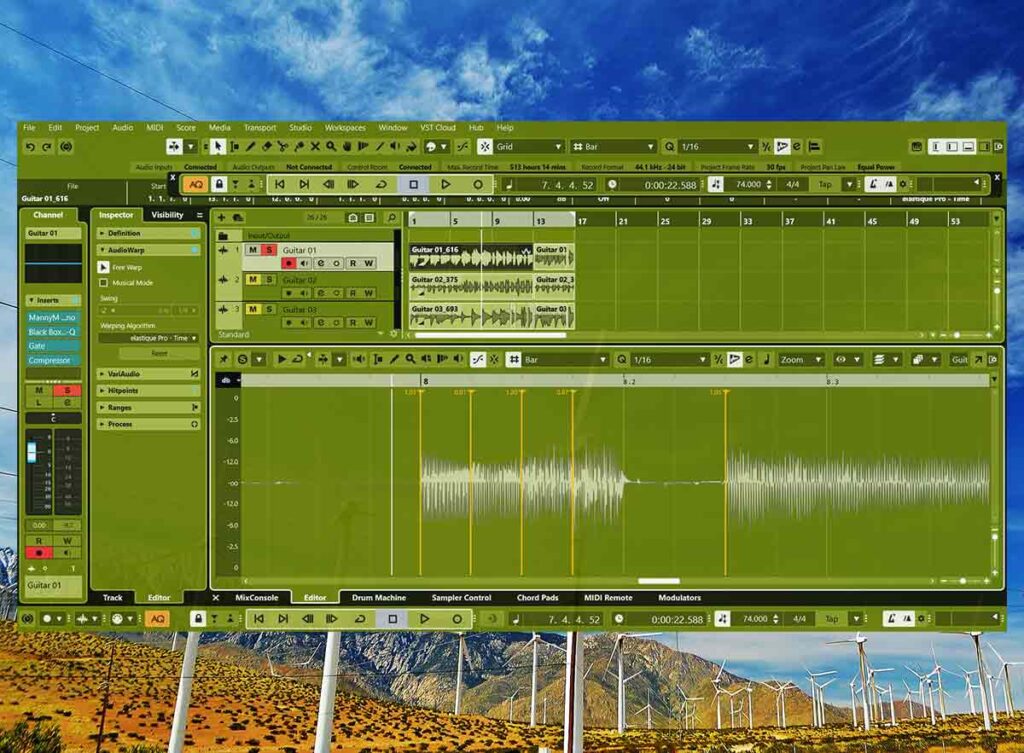
Now when we click quantize the audio will snap to the grid. When we hold the alt key in free warp mode the mouse turns into eraser and we can delete warp points. After we adjust a warp point we can click quantize again and the track will fix itself.

Audio Warp Done

The tracks are straight now so we can cut the tracks and then colour them. The audio is good so now we can move on to the midi instruments and sampler tracks. After we record all of the midi tracks we can arrange all the tracks and finish the project.